MosaicBlues: fiberglass .entry-content { font-size:25px !important; }
Showing posts with label fiberglass. Show all posts

Friday, August 19, 2016

The Troy Benches - Les Bancs de Troy.


The Wiregrass Mosaic Project consists of covering several sets of concrete table and benches located on the Dothan Campus with individual mosaics created bya a great number of individuals. 

Over 500 people each created a small mosaic on a piece of fiberglass mesh.

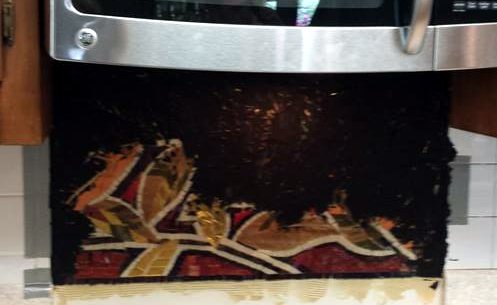
Now I am setting these mosaics on top of the benches.

Later on this summer  I will fill the space between tiles with a coloured grout.


Hopefully we will have a grand magnificent opening in the early fall !


This project is being realized in partnersip with the Troy University Library and the Wiregrass Museum of Art


Le Projet de Mosaïques du Wiregrass consiste a recouvrir plusieurs ensembles de tables et bancs en béton avec de petites mosaïques individuelles. .

Plus de 500 personnes ont chacune réalisé une petite mosaïques sur un morceau de toile de verre. 

Sur cette vidéo j'installe les mosaiques sur les bancs. 


Je suis désolé, la première partie de la vidéo est en Anglais, j'ai ajoute des sous-titres. 

Plus tard cet été je remplirais les joints avec un mortier de remplissage. J’espère avoir une inauguration au début de l'automne. 

Ce projet est réalise en partenariat avec la bibliothèque de la Troy University a Dothan, Alabama, et le Wiregrass Museum of Art. 


I am a French mosaic artist based in Alabama. My Art is about Inspiring people, I am presently working on these huge portraits of the eyes of Yezidi Refugees. If you are interested by my work, please contact me by phone at (334) 798 1639 or by email at frederic.lecut@mosaicblues.com
You can also subscribe to my NEWSLETTER


Je suis un Artiste Mosaïste installe en Alabama. Mon Art est a propos de l'Inspiration. Présentement, je travaille a ces grands portraits des Yeux de réfugiés Yézidis
Si mon travail vous intéresse vous pouvez me contacter par téléphone au 334 798 1639 (aux Etats Unis), ou par email a frederic.lecut@mosaicblues.com
Vous pouvez aussi souscrire a ma Lettre d'Information


Sunday, July 19, 2015

Flying with Mosaics


Although my last mosaics are lighter than they were 5 years ago, they still are 5 to 10 times heavier than a painting of the same dimension. 


This may be why galleries do not like mosaics very much: they find them harder to hang on a wall. Actually, there are now easy ways to hand heavy loads on any kind of walls, at a reasonable cost. I'll review these methods in a next post.

An other negative aspect of a mosaic's weight is  Shipping...

Over the past 2 years, I have sold 4 mosaics in France. Shipping them would have been very expensive, so I simply travelled with them. I carried an extra piece of luggage with my mosaics in it.

As long as you keep the total of added dimensions under 64" (160 cm) and the weight under 50 lb (23 kg, it costs $100.00 for one additional suitcase on a transatlantic flight. 

I have reduced the weight by 70 % by building my mosaics on fiberglass mesh. All that travels with me are the Tesserae glued on a very light mesh. No concrete, no backing board. I now have in France a small studio where I mount my mosaics on their final support and frame them.


Mosaicblues French Studio, Dec 2014


The important point is to pack them very carefully. 

Here are the 4 pieces flying to France with me mid-July 2015.


From top to bottom and left to right : 2 Green Eyes Girls, Carlotta, and the Pomegranate Tree. These 4 pieces are reverse method, so what you are now seeing are their backs. 

I built a wooden crate / suitcase for them. The contour of the crate was made of 3/4 " (19mm) yellow pine wood, the sides of 1/4" (6 mm) plywood, reinforced with fiberglass mesh. 

I placed a sheet of 1/2" (12 mm) insulation foam at the bottom and placed "Carlotta", sandwiched inside an envelope of tar paper on top of the foam.


I slightly sprayed the mosaic with water to increase its flexibility and I placed an other layer of 1/2" foam on top of Carlotta.


I then installed "Pomegranate Tree" on top, also wrapped in tar paper.


Covered it with more insulation...


I placed the 2 Green eyes Girls over this. 


And covered them with another foam sheet. 


I have some space left, which I'll use for various goodies to bring back home (Mexican Chorizzo among other things...)


Next Month I'll tell you more about each one of these pieces coming with me to France...


I am a modern mosaic artist with a deep admiration for ancient Greek, Roman and Byzantine Arts. You can see my own mosaics on my site at mosaicblues


If you are interested by my work or would like to drop me a line please contact me by email at frederic.lecut@gmail.com or by phone at (334) 798 1639. 

You can also

(and I recommend it !)


Monday, July 6, 2015

Spring Festival Mosaic.


It all started with an email "Frederic, we have this Spring festival on the Headland square in 10 days, do you think you could do a mosaic class for some kids ?"

I was not really thrilled at such a short notice, but when I realized this could be a great opportunity to  further test some ideas I had had in the back on my mind for a while, It became much more interesting !

Could I take 20 kids, teach them how to make a mosaic and get a decent result out of it ? 

In March, I had already experimented at the Wiregrass Museum of Art, with precut glass tesserae.


Each student had taken home their own mosaic. Now was the time to get people to cut their own tesserae. and to use each individual piece as part of a bigger work.

To make things easier, we would  use : 
  • Ceramic tiles much easier to cut than stone, glass or porcelain;  
  • 2 only colours : Black and White; and 
  • 2 only basic designs for everyone to follow. 


I know, these are white and blue...


I could not get blue tiles !


On May 19, we set shop on the Headland Square. We had 2 groups of kids, those of ages 7 to 13 accompanied by their parents, and those over 14 by themselves .


At the end of the (long) day, we had 21 small squares mounted on fiberglass mesh. 


I took all of them home to my mosaicblues back yard to put them together on a framed backing board. 


The Panel before grouting.


On June 19, we had the grand presentation of the Panel at the Headland Municipal building. Some of the kids who participated in the project were present.


Everyone - that includes the kids themselves - was very impressed by what they had been able to do.

One important thing about mosaic, is that you can touch them, this is very important to children who have a very tactile reference to the world. 


I had brought the extra mosaic I had not been able to use for the panel (I only needed 20 and I had 21 pieces) and let the children handle it.


This project was made possible because lots of people pulled together. Rhonda Harrison, Executive director of the Headland Chamber of Commerce, Home Depot who gracefully subsidized most of the material and equipment, and the Headland Police Department who financed the rest of the project.

The mosaic is visible in the main hall of the Headland Municipal building on the Headland square.

What's next ? 

Bigger projects - first one will be in partnership with Troy University and should involve 80 to 100 participants, I will keep you posted.  Nexts are being presently discussed. I have big dreams ... And I'll need help ! 


I am a modern mosaic artist with a deep admiration for ancient Greek, Roman and Byzantine Arts. You can see my own mosaics on my site at mosaicblues


If you are interested by my work or would like to drop me a line please contact me by email at frederic.lecut@gmail.com or by phone at (334) 798 1639. 


You can also 

(and I recommend it !)


Monday, May 25, 2015

Spring Mosaic Workshop, Adult class


Last march I gave a Kids mosaic class at the Wiregrass Museum of Art.

The kids had realized small (6 x 6") mosaics following the pattern of the Solomon knot.

Last May 9, I gave a similar class for a group of adults.


 They realized a same type of Solomon knot, only bigger (10 x 10").


The purpose of these 2 classes was more technical than creative. I wanted to show people how they could make their own mosaic. 


I also wanted to show how you can create a direct method mosaic on a mesh, which you would later be able to glue on a rigid - flat or curved - support.

Practically, the mosaics were realized by gluing on a fiberglass mesh small precut square glass tesserae. The fiberglass mesh was laid on top of a printed model, and the small glass tesserae glued on the mesh, following the pattern underneath it.

At the end of the class, the mosaics were left to rest for 48 hours, the time for the glue to set. 


On May 12, I separated the mosaics from their models. 


This piece is flexible and can be gently rolled. 

I clipped the mesh around them,


And lined them up together. 


See how beautiful this turns out to be ! These mesh mosaics could now be glued on any support. 

Can you imagine us getting hundreds of them ?  We could cover a whole wall, a column, a whole house, a statue...

And this, my little friends, we shall further discuss in the course of this year...


I am a modern mosaic artist with a deep admiration for ancient Greek, Roman and Byzantine Arts. You can see my own mosaics on my site at mosaicblues


If you are interested by my work or would like to drop me a line please contact me by email at frederic.lecut@gmail.com or by phone at (334) 798 1639. 


You can also 
 
(and I recommend it !)


.

Wednesday, December 24, 2014

Mosaicblues opens French Studio


In a previous post I told you how was trying to solve the problem of shipping mosaics abroad. Mosaics being made of heavy stone, ceramic and glass mounted on cement and concrete materials, they are heavy and costly to ship.

Experimentation in June 2014 showed that by building my mosaics on a fiberglass mesh I would able to reduce the shipping weight by 55 to 65 %.

 
Miriam's Eyes, June 2014


I still had to be able to mount the mosaic on a solid support at its final destination, or in a workshop close to it, so I can drive to my patron's home or business to deliver and install the piece. 

Basically, I needed a finition shop in Europe.

I am pleased to announce the opening of Mosaicblues France.


My new studio is located in Saint Valery sur Somme, the very town from which William sailed to invade Britain in 1066 !


I landed in Paris with my mosaic on December 17 and started to set up the shop and work in it on December 18. 


The shop does not include heavy stone cutting or glass grinding equipment. I will simply be building frames and mount the mosaics on them.


My goal is to be able to simply mount lightweight, fiberglass mounted mosaics on a rigid support. These piece are still prefabricated in Alabama. 


Lu2 Mosaic, October 2014


On a next Episode of this amazing  
see the first French mounting of a Mosaicblues mosaic !


Monday, April 14, 2014

Fall Foliage


I made Fall Foliage for a friend of mine who asked me last Fall if I could do something to hide the wall behind her kitchen stove.

Becky's house is nice and spacious, it shelters beautiful ancient furniture and is built around a luminous octagonal living room decorated with beautiful art. Becky also has a passion for gardening. She loves to spend time out in her yard enjoying her plants and trees.

First we had to find the best design fitting her kitchen and tastes. Becky expressed her wish to have something inside the house reminding her of her garden outside. I proposed her different designs : 

Green Jungle


Golden leaf


Red Maple

To help her better visualize the final result I created images of what the mosaic would look in her kitchen.

Finally, I came up with an example of a richly coloured pattern of fall foliages, and we decided for that one. 


This was mid November 2013, and I could get in gear.

Because the wall receiving the mosaic is made of sheetrock and part of the piece would be behind the stove, we needed a very thin piece. This way the stove would stay flush with the kitchen countertop. 

I decided that I would use glass only, and build the mosaic directly on top of a fiberglass mesh. This mesh would then be directly glued on the wall once the piece complete. 

First came the black and white drawing of the piece at the actual dimensions on heavy white paper.


Black and White Sketch - December 5, 2013

I added some colours to make all contours more visible.

Contoured sketch, December 5, 2013.
Once this model laminated, I could actually start to actually build the mosaic. 

Right before Christmas, I laid a layer of Fiberglass mesh on top of the model and started to glue some red glass tiles onto it.

December 22, 2013

And I flew back to France to deliver an other commissioned mosaic...

Ubi to Gaius Mosaic (2013)


... and spend the holidays with family and friends.


Back in Alabama I resumed the work in January, adding several colours to the work, Beginning with the leaves.

Fall Foliage, January 12, 2013
 I used various shades stained glasses and mirrors.

Fall Foliage, January 13, 2013.

Some of these materials came from the USA, others from France and Italy.

On February 9, all leaves had been laid. 

Fall Foliage, February 9, 2014.

And I started to work on the branches and contours of the leaves.

Fall Foliage, February 15, 2014.

Finally, by the end of February, all glass tiles had been glued to the mesh and I was able to separate the mesh from the model.

Fall Foliage would finally get out of the workshop to see the sun !


Fall Foliage, March 2, 2014


You can judge by yourself how the nature of the light totally change the way a mosaic looks !


Fall Foliage, March 2, 2014.

It was now time to install the piece on site.


I first glued the piece to the wall and completed the tile work on both sides of the stove.


Fall Foliage, March 15, 2014.


We let the glue set for 2 weeks before the first application of a black unsanded grout.


Grouting - a dirty business...


Fall Foliage, March 30, 2014

When I use different colours grout on a same piece, I like to begin with the darker one. I apply each colour on a different day and waterproof each colour grout before I apply the next one. 

I grouted the white tiles on April 3rd, and completed the waterproofing on April 5. 

 
Fall Foliage, April 5, 2014.


Fall Foliage Mosaic - detail 1.


Fall Foliage Mosaic - detail 2.


Fall Foliage Mosaic - detail 3.

MISSION ACCOMPLISHED !


If you would like to discuss the commission of a mosaic please call (334) 798 1639 or email me at frederic.lecut@gmail.com. I also have finished pieces available at mosaicblues.com.